========>>>>
As I am newly starting photoshop tutorial I will go with basic stuffs first. Let start with this tutorial. In thsi tutorial You will see how to convert a normal Image into a sketch Image. As you can see the example above.
Take any photo and follow this step and you will be able to convert that photo into a sketch. as if you had drawn with your hands :P.
Anyways lets get start now there are few basic features of photoshop that we will use today :
- Layers
- Blending Mode
- Image Adjustment Layers
- Filters
So lets get starterd now.
- Open your image in photoshop for which you want an sketch look. Now you need to desaturate the image which will make the image black and white [Image > Adjustments > Desaturate ] or simply press [ ctrl + shift + u ]

- Make a copy of the layer now by selecting the duplicate layer option. [ Right click on the layer > Duplicate layer ]
- After doing that, we need to invert the color of this layer. That is done by [ Image > Adjustments > Invert ] or [ ctrl + I ]
- Now go to the blending layer option and select the color dodge option

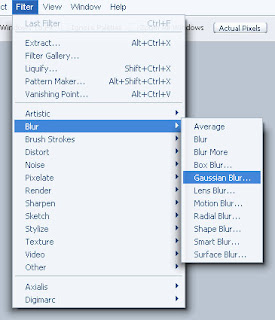
- Next step is to go to give the image a blur (Gaussian) which will work in favor of making the image visible. [ Filter > Blur > Gaussian Blur ] Anything from between 5px to 40px would work well depending upon the image type. Ideally use around 15 to 25.